Better Mobile Photography 02 [214]
Part two of five
Welcome to part two of this five part mini series for supporters of my email. Should you need to catch up, part one is here.
The series focuses on taking better photos with your phone and this issue is about preparing and being ready to grab the shot.
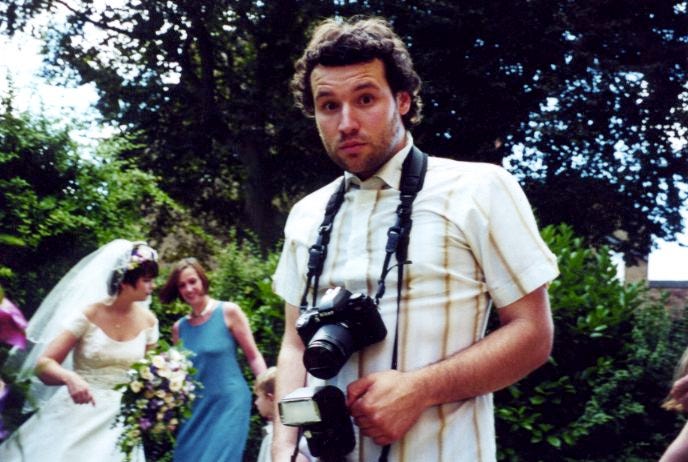
Some cameras are quicker at taking an image than others. Photo by @PhilSands …and yes that’s me in a kilt.
Be prepared.
Even if you’re not looking to grab breaking news you’ve most certainly missed a few shots you wish you’d captured. A child’s first steps, a friends laugh, a landscape in perfect light.
Having your mobile device with you is one thing, remembering how to use it under pressure is another. When things happen, they can happen fast and you don’t want to miss the moment.
Back when I was a snapper for the dailies we’d wear our cameras around our necks. Even when I’d reluctantly take a wedding assignment I’d sometimes hang two cameras on the same strap.
A wide angle for things happening in front of me and something with a longer focal length so I could grab things further away. (Although I had the lens cap on one of my cameras in the above shot so I was ready for nothing.)
I miss wearing a bulky camera around my neck. You felt like you could go places you would not normally belong. One camera worked but two cameras really opened doors.
Having two cameras seems extravagant but changing a lens takes valuable seconds. seconds. Seconds where scenes you wish you’d grabbed can pass you by. Thankfully changing a lens on my phone is now as quick a touching the screen.
There are still limitations to taking photographs on a phone but speed is not one of them.
I prefer to use a case that allows easy access to the camera. As long as you don’t have your phone in a folding case, you can quickly be ready to grab a shot. Practice using every aspect of the camera from hitting the shutter button in the lock screen, switching between lenses, or turning the flash off and on manually.
Also pay close attention to your battery level indicator. Especially if you’re shooting film as well as photos.
Once all this is second nature you will notice more, capture more and if you need to, quickly share images to tell stories in realtime.
A photographer always sees something. Unless they are preoccupied with a screens menu.
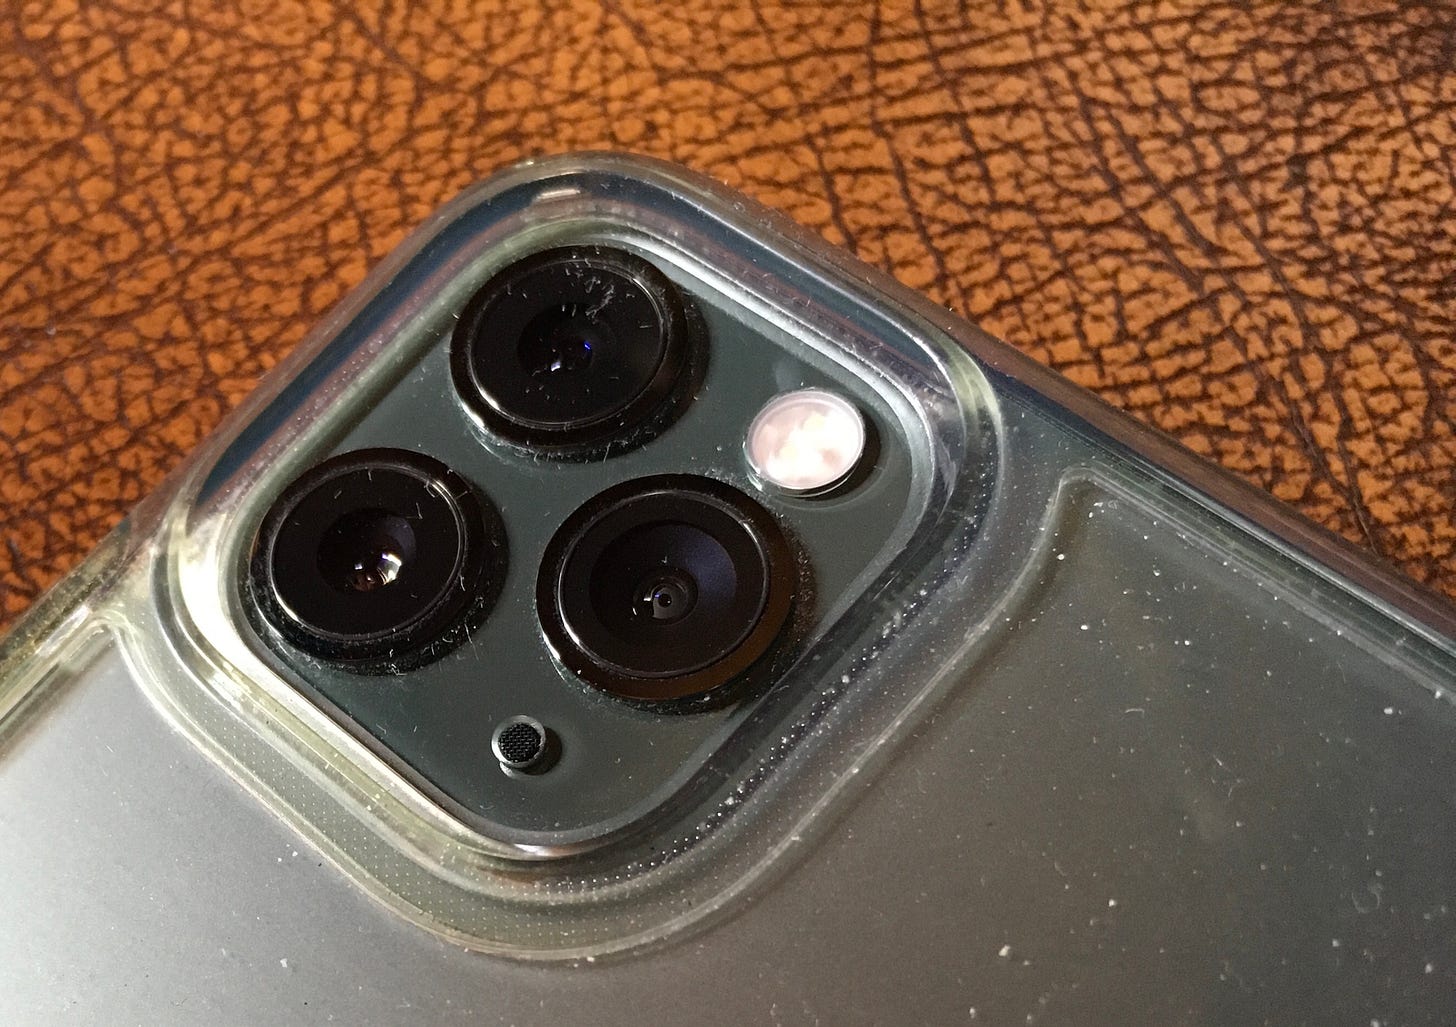
Next time you take a blurry photo check your lens. Mobile devices have a habit of picking up grime. There’s the fluff and particulates from travelling between pockets and bags and then of course fingerprint grease from constant handling.
Luckily most lenses are made of tough stuff allowing you to wipe them clean with almost any fabric. Ideally you will take a soft clean ’micro-fibre’ cloth to wipe the grease away. Rubbing to clean very dirty lenses is not advised and some recessed lenses, especially those sat behind a protective case can gather grit and particulates. This is when a small lens blower or brush comes in handy.
I try not to use alcohol for cleaning lenses unless there is really stubborn spot and then I use a specialist lens cleaning solution with a biodegradable cotton earbud. Using solvents or rubbing a gritty lens can cause permanent damage. And while replacing a lens on a mobile device is not impossible, it is a specialised and expensive job. So do take care and treat it like it were the only lens on your most used camera. Which it probably is.
When holding a small lightweight device and taking a photo, stability is key.
Holding your phone at arms length in your fingertips will introduce all kinds of unnecessary movement as well as increase the risk of dropping your device.
Higher spec phones now have inbuilt stabilisation. You can assist this by keeping elbows in and arms bent. Ensuring the camera is close will minimise the movement that causes camera shake. Especially when shooting in low light.
I don’t use the volume button to take photos. The side buttons are mechanical and can sometimes be stiff. A press of the screen only requires the lightest of touches with your thumb to activate the shutter. I hold my phone with my index fingers curled around the case and my middle fingers curled in front. Be aware that with the wider lens options on some phones your fingers can easily pop into shot. So, with elbows in I prefer the phone no more than about 8-12 inches away from my face.
If you need to change the focus point, touch the screen where you need the camera to focus and then take a breath before lightly touching the shutter release to capture the image.
Remember, it only needs the lightest of touches to trigger the camera when using the screen button. There are no hard and fast rules here. You will find what’s more comfortable for you. Just try not to jab a finger at the screen.
And if you did hold your breath during image capture. Don’t forget to resume breathing.
So to ensure there is no camera shake, take a breath, hold it and lightly touch the shutter release to take your photo. If you need to take a series of images keep your thumb against the button (or slide it) for ‘rapid-fire’. Some devices then let you to select and keep the best.
Most cameras have some kind of face tracking feature and will prioritise a face over other objects in the image. This is handy at times, but if the camera is confused by the scene in front of you, you may need to over-ride the autofocus. You can do this by touching the screen where you want the camera to focus.
When you get comfortable taking point-and-shoot images you may want to experiment. There are always a few more camera features hidden within an interface or menu.
It’s difficult to highlight all the options for the various Android installs so I’ll focus mainly on iOS (Apple) devices here.
When speed is important you can access your camera on an iPhone quickly from any screen (even the lock screen) by simply swiping up the top right corner down.
Depending on your operating system, once the camera app is open, swiping left and right will give you different image capture options. From shooting in portrait or high resolution panorama to video capture options. Frame ratio and flash settings are normally available at the top of the screen.
The shutter button does more than snap an image. One quick press will do that. Pressing and holding the shutter button records video while it’s held. Swiping to the left activates ‘burst mode’ and swiping to the right locks the video on. (This is on the latest iOS on the latest Apple device. Your device might be different.)
Top right has the live photo option and tap the bottom right to flip to the front facing camera or ‘selfie cam’. Bottom left takes you to your shots.
If you want an iPhone camera to lock focus and exposure you need to press and hold the screen on the spot you would like the camera to lock on to. Sliding a finger up or down while holding will adjust the exposure.
Some third party camera apps enable you to touch the screen with two fingers to activate independent focus and exposure controls.
“If the photographer is interested in the people in front of his lens, and if he is compassionate, it’s already a lot. The instrument is not the camera but the photographer.”
~ Eve Arnold
I own a variety of camera clamps mounts and attachments but in my opinion, if you’re going to bolt all kinds of paraphernalia to your phone to make it a ‘better camera’, you are missing the point of using a phone in the first place.
I think the skill in photographing with your mobile device lies not in how much stuff you can bolt to it but how much you can do with just your eye, the phone and perhaps a few apps.
There are some gadgets and gizmos that will certainly assist and inspire you to take great pictures or film footage. Just make sure you can differentiate between an attachment (like a battery case) that can truly enhance and overcome your devices limitations, against an overpriced, unnecessary bolt on distraction, (like a sunshade) which just complicates your picture taking and is less versatile than your hand. A hand which you carry around with you already.
There will be occasions when a powered case, a lapel mic or mini tripod are invaluable. Just don’t let these add-ons get in the way of the convenience of working with just your phone.
Once you switch from a non-networked stills camera to a connected device, you have easy access to image capture and sharing at little to no cost. Capture what you can. And a lot of it. If you back up your phone regularly you can afford to take too many shots. The more you take the more chance of getting shots you are happy with.
Where you share can help you hone your skills. Try to find the photo sharing playgrounds where you will learn the most. I really liked Photosig and learned a lot there. Sadly it is no more. I still occasionally share to Flickr.
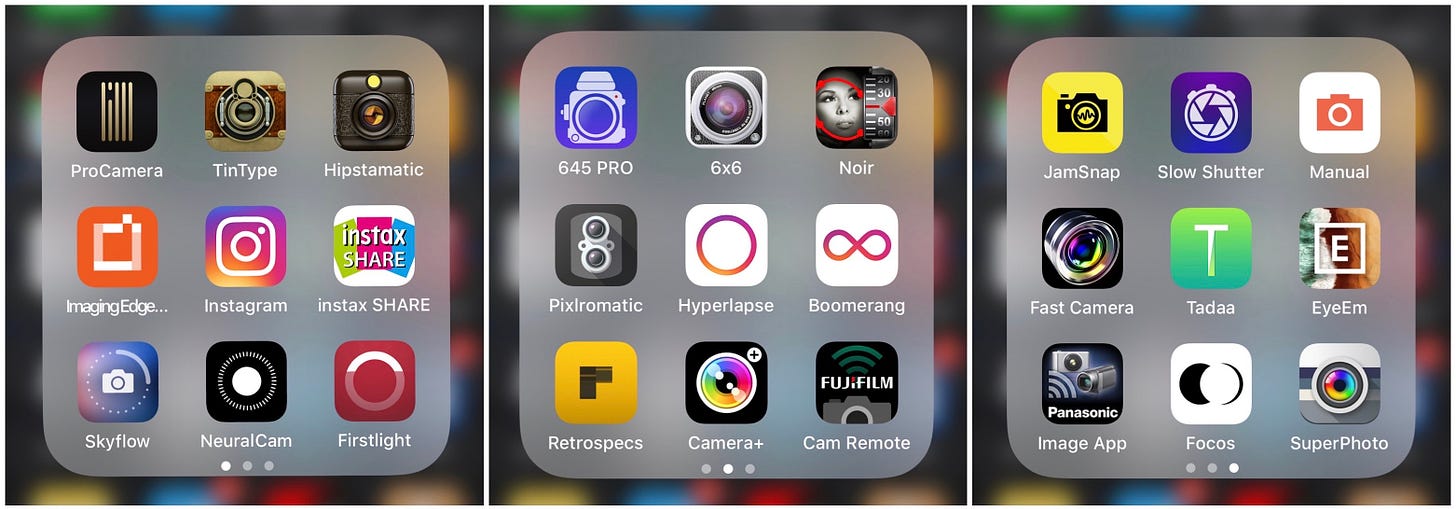
I have a phone full of apps designed to ‘enhance’ my smart phone photography. But photography is really all about seeing, being, feeling and of course light. Rather than using these apps to make mediocre images more interesting. How about getting the best image you can from the off? Learn what works, then experiment in breaking the rules.
Photo taking and editing apps can give you the extra control needed to produce great images, but ideally it’s best to have a basic photography knowledge before you open the most simple of photography apps. This will help you understand the importance of finding the ‘right light’ and knowing when to press the shutter. Plus ideally assist you in capturing better shots, in less time, with fewer adjustments in post production.
And then there is the other extreme. Ambient photo capture. Taking photos without thinking about it and curating later.
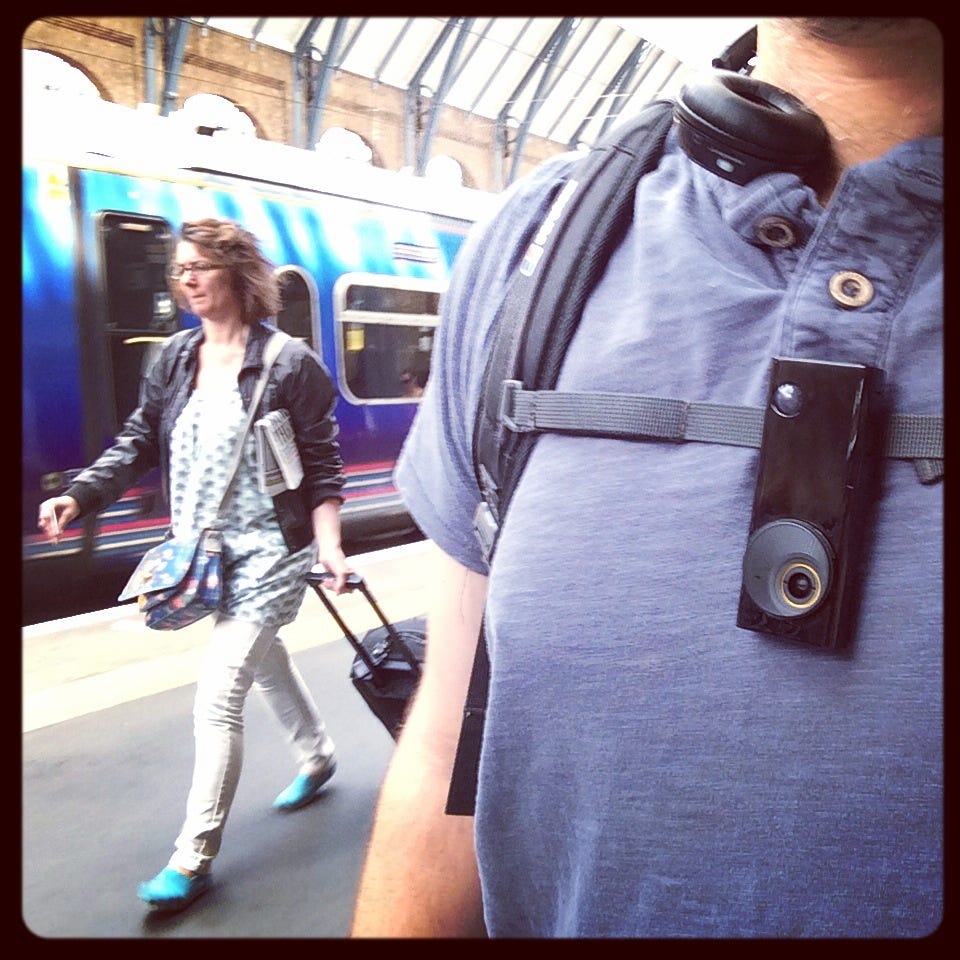
Google discontinued it’s Clip camera and I’ve not seen a Canon Clippable in the wild. Seven years ago I had fun experimenting with wearable cameras. Both the Narrative Clip and the Autographer were cameras designed to be worn and forgotten about. You go about your day and the device goes about documenting it. Of course it’s not really like that. You clip on or hang the camera round your neck and for the first hour or so you are wondering who’s looking at your new device. If you do forget you are wearing it others will certainly remind you.
The Narrative would snap and store images throughout the day waiting for you to be back at your PC before you could upload to the cloud to then review and share the captured moments with your phone. The Autographer enabled you to view your photos via bluetooth to your device at any time. From the app you could share stills, videos or animated GIF’s. With both of these devices you are looking at quantity over quality but you begin to think (privacy concerns aside) that perhaps 200 naff images are worth trawling through to find the one or two moments you would never have captured if you had to think about it.
But let’s not get too hung up on the tech. Photography shouldn’t be about devices and apps. They’re just tools used to capture the image you’ve found.
I’ve probably taken more people shots than anything else. Getting a stunning portrait on a mobile device used to be more challenging than on a traditional camera. Bulkier cameras had the flexibility of interchangeable lenses and manual settings. But with computational photography the playing field is quickly being levelled.
As with all photography, the rules are there to be broken. The more images you take the more you will get a feel for what you like. Play around with certain formulae till you get the shot you want.
In the next issue we will look at some of those formulae that might help you take interesting and different portraits. In particular how to click with the subject before you click with the camera.
If you find any of this useful please tell others and/or ‘like’ the webpage.
If you share this via email please ask the person if they might like to subscribe.
And if you’d like to share any of your own photography tips or stories please leave them in the comments.
Thanks for reading.
Stay curious,
Christian


